
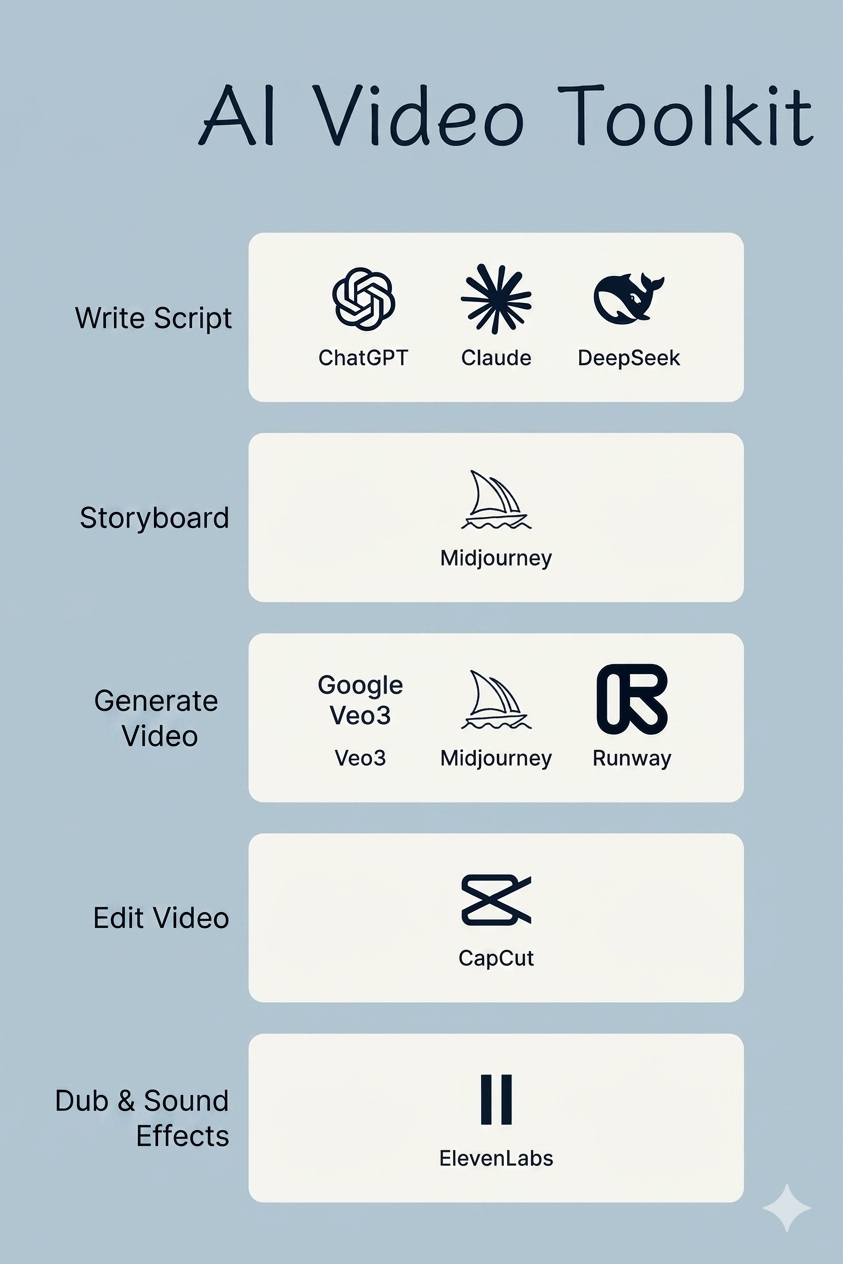
A simple AI video workflow you can actually use
A lot of AI video advice is still too vague. This workflow is better because it gives each stage a clear job. You are not asking one tool to magically do everything. You are moving from script to images, then from images to motion, then from motion to voice and final edit.
By Kele Wang
This post became popular because it turns AI video into a production chain you can follow. If you are making shorts, explainers, or creator content, that structure is way more useful than random prompt collecting.
The short version
Start with a script. Turn that script into visual shots. Animate the shots. Add voice. Then assemble everything in the editor. Simple chain, better results.
The 5-step workflow
Write the script and storyboard first
The note suggests starting with a language model such as ChatGPT, Claude, or DeepSeek. The goal is not just “write a topic.” The goal is to get a 60-second script broken into scenes, so each shot already knows what it is supposed to do.
- Decide the topic and angle first.
- Turn the script into scene-by-scene beats.
- Use that scene list as the handoff document for the next tool.
Generate the visuals
Once the scene list is ready, the post moves into image generation with Midjourney. The practical point is that each scene becomes a shot description, not a random one-off prompt.
- Convert every scene into a visual brief.
- Lock the format with aspect ratio and style controls.
- Keep the look consistent across scenes so the final video feels like one piece.
Turn still images into moving shots
The note then points to video tools like Veo3, Midjourney Video, and Runway. This is the “make it move” stage. In other words: composition is handled earlier, movement is added after.
- Feed the selected stills into a video model.
- Animate shot by shot instead of asking one prompt to invent the whole edit.
- Keep motion choices aligned with the original script instead of adding drama just because the tool can.
Add the voiceover
The source graphic uses ElevenLabs for narration. That choice makes sense because voice is treated as its own layer, not something glued on at the end with whatever default output happened to be available.
- Generate narration after the visual structure is clear.
- Match pacing to the shot list.
- Use voice to tighten the story, not to rescue a weak structure.
Assemble everything in the editor
The final stage in the note is CapCut. This is where clips, music, captions, and narration become the finished piece. The point is not the specific app. The point is that editing is the final assembly stage, not the place where the entire workflow gets improvised from scratch.
- Bring clips, audio, captions, and music together.
- Trim for rhythm and clarity.
- Make sure the final video still matches the original idea.
Why this workflow works
It is simple, but that is the point. Instead of asking one AI tool to write, design, animate, narrate, and edit all at once, you split the work into stages. That gives you more control over structure, style, and pacing.
If your AI videos feel random, this is a better place to start than chasing more prompts. Build a clean sequence first. Then improve each stage one by one.
Tool stack, in plain English
ChatGPT, Claude, DeepSeek — used for scripting and scene planning.
Midjourney — used to create the still visuals for each scene.
Veo3, Midjourney Video, Runway — used to animate the still images into shots.
ElevenLabs for narration, CapCut for final assembly and polish.